nodejs로 서버를 구성하고, socket.io 를 통해서 웹소켓을 구성하려고하는데 해당 에러가 발생하였다.


node.js TypeError: path must be absolute or specify root to res.sendFile [failed to parse JSON]

이유인즉슨, result.sendFile( ) 에서 [절대 경로 설정 or Root 경로 설정] 을 해주지 않았기 때문이다.

(라고 stackoverflow에서 말함)


그래서 해결방법은 간단하다.

__dirname 을 추가해주면 된다. -> 요청한 경로를 따라옴

app.get('/', function(req, res){
        res.sendFile(__dirname + '/index.html');
        });


일단 그래서 해당 에러는 해결이 되었다.


node.js TypeError: path must be absolute or specify root to res.sendFile [failed to parse JSON]

[add] So my next problem is that when i try adding a new dependence (npm install --save socket.io). The JSON file is also valid. I get this error: Failed to parse json npm ERR! Unexpected string n...

stackoverflow.com


반응형


사용환경 :  Ubunut 20.0.4 LTS, Apache2.x, Node.js, Javascript


Apache설정 변경

# /etc/apache2/sites-available/000-default.conf  내용 추가

<VirtualHost  *:80>
ServerName example.com

           ProxyRequests Off
           ProxyPreserveHost On
           ProxyVia Full
           <Proxy *>
              Require all granted
           </Proxy>

           <Location /nodejs>
              ProxyPass http://localhost:3000
              ProxyPassReverse http://localhost:3000
           </Location>

            <Directory "/var/www/example.com/html">
                    AllowOverride All
            </Directory>
</VirtualHost>

3000포트로 허용함을 설정

$ sudo service apache2 restart

아파치 서버 재구동 


# /var/www/html/nodejs/hello.js

var http = require('http');
http.createServer(function (request, response) {
   response.writeHead(200, {'Content-Type': 'text/plain'});
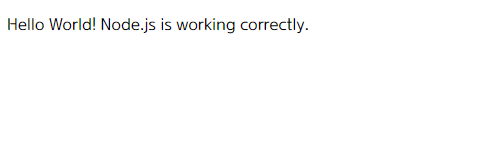
   response.end('Hello World! Node.js is working correctly.\n');
}).listen(3000);
console.log('Server running at http://127.0.0.1:3000/');
console.log('It is running now...');

마찬가지로 3000포트 연결 설정


hello.js 파일 실행

$ node /var/www/html/nodejs/hello.js 

console.log 했던 내용 출력


http://example.com:8080/node.js/
접속

접속완료


일단 서버 내에서 8080포트로 접속하여 3000포트의 Websocket communication 로그 출력이 완료되었다.


Apache + Node.js + socket.io

코드 이그나이터에서 웹소켓을 돌리는데 드디어 성공! 꽤나 뿌듯하다. 스택 오버플로우와 국내 블로그의 도움을 많이 받았다. 순서대로 오늘 한 일에 대해서 나열해보자면 1. 공유기 포트포워딩

blog.rgbplace.com


Set Up a Node.js App for a Website With Apache on Ubuntu 16.04

This tutorial will explain how to set up a Cloud Server running Ubuntu 16.04 so that Node.js scripts run as a service, and configure the Apache server to make the script accessible from the web.

www.ionos.com


Behind a reverse proxy | Socket.IO

You will find below the configuration needed for deploying a Socket.IO server behind a reverse-proxy solution, such as:

socket.io


반응형


Node.js, JavaScriptWebsocket을 이용해 간단한 셀프 채팅 어플리케이션을 구현하겠습니다.

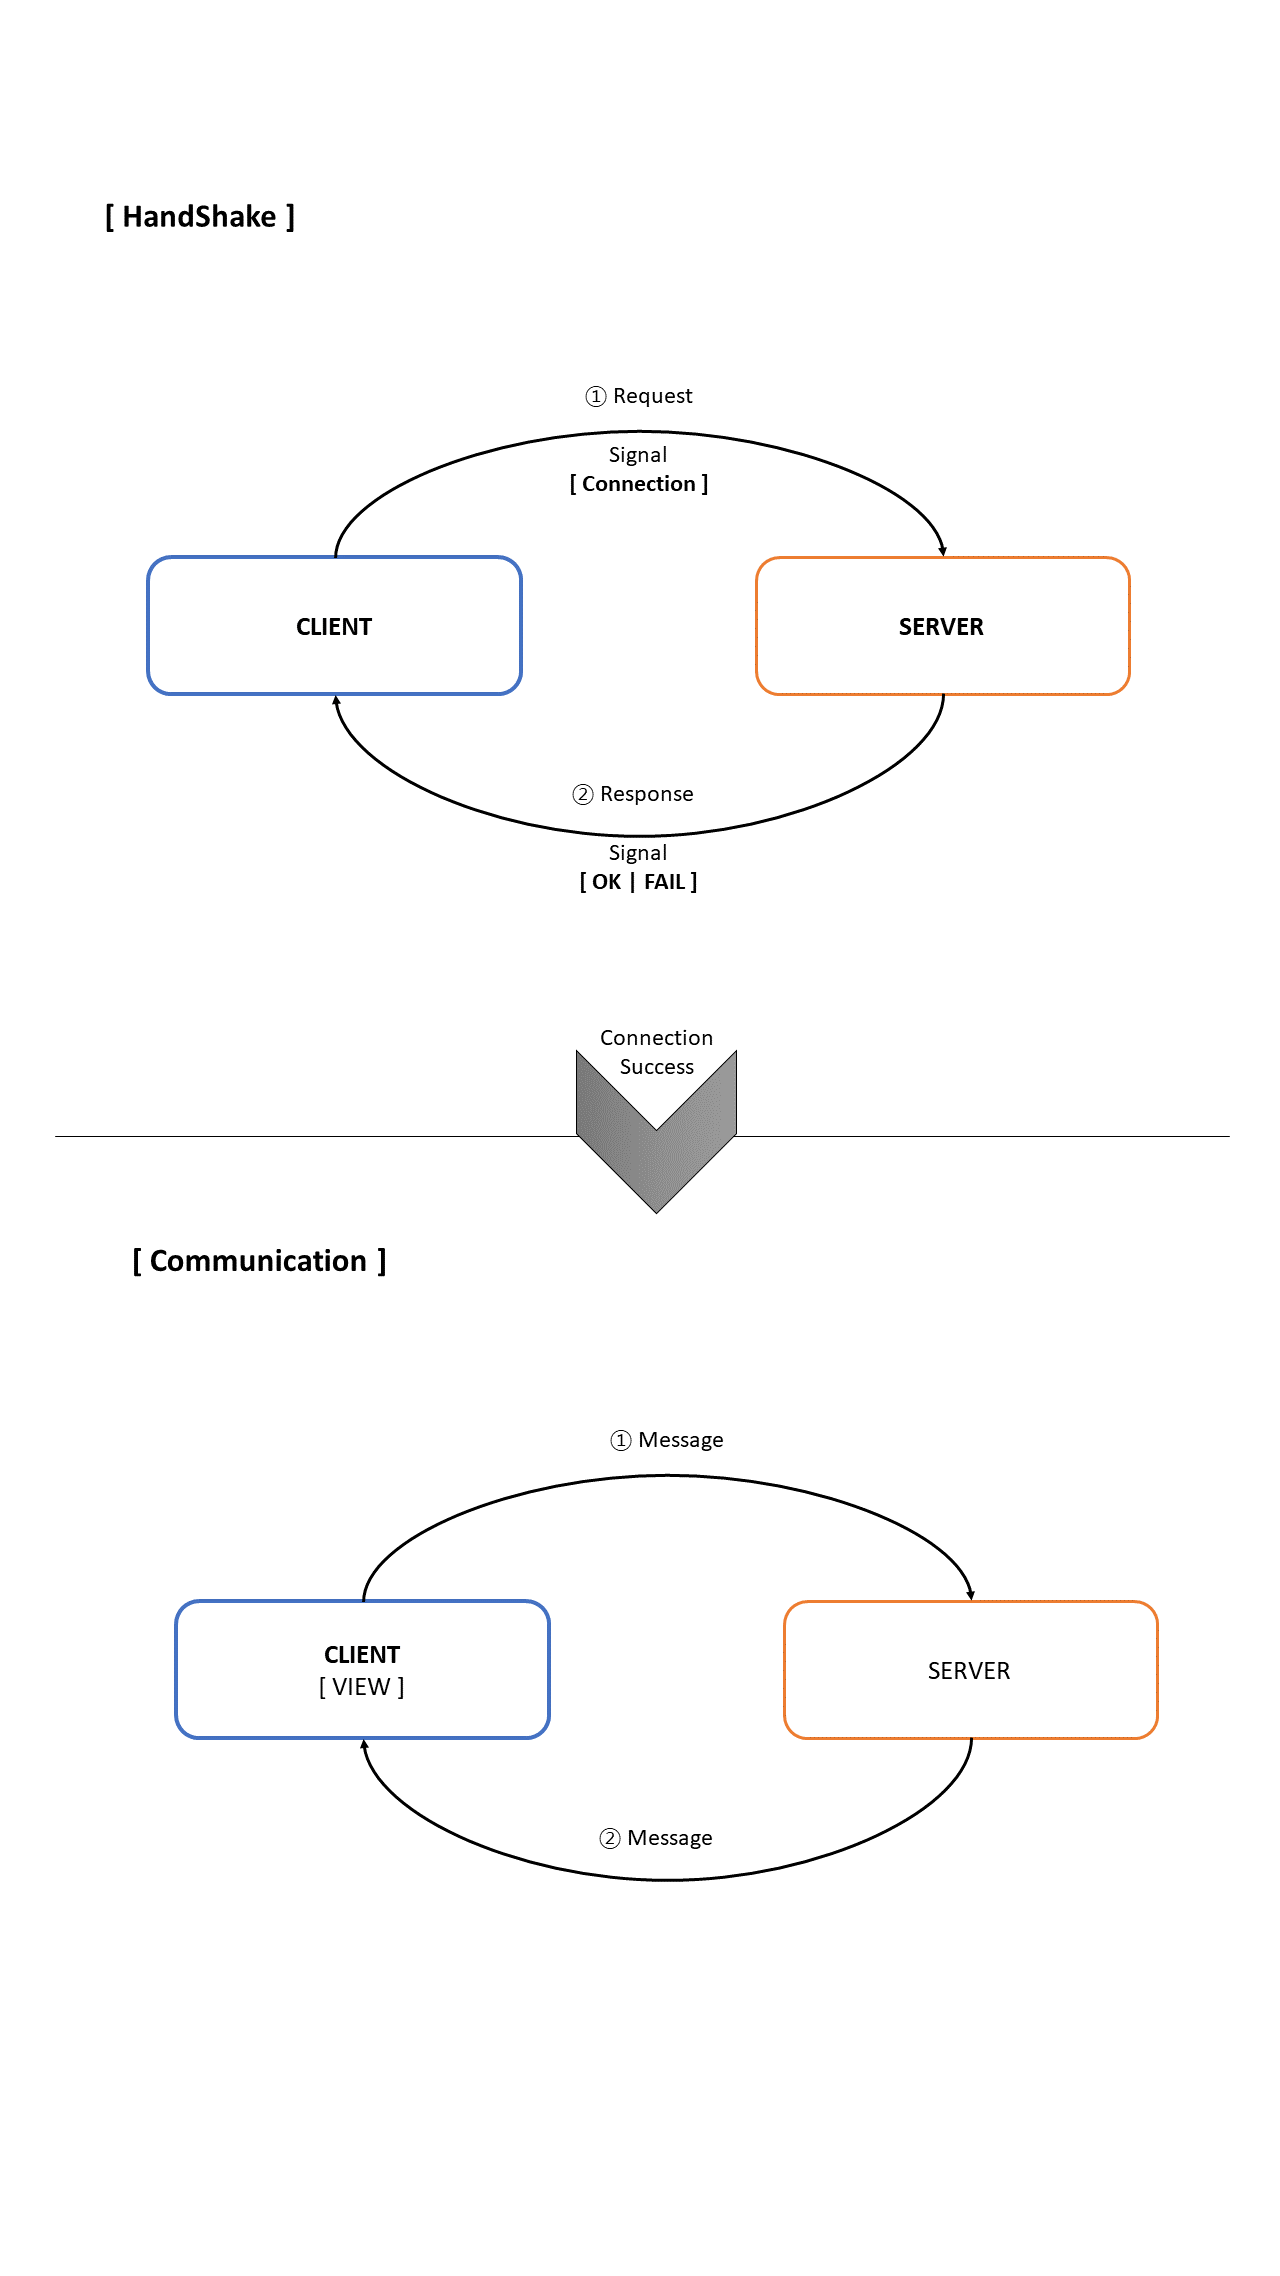
웹소켓의 기본적인 구성은 다음과 같습니다.

2단계로 구성한 웹소켓

굳이 개념치 않다면 안보셔도 무방합니다.

■ ws 설치 

$ npm install ws

우선 npm 명령어로 ws (web socket)설치하도록 하겠습니다.


■ Server.js

var WebSocketServer = require('ws').Server;
var wss = new WebSocketServer( { port: 8900 } );    // 포트번호는 자유롭게 작성해주세요.

wss.on( 'connection', function(ws){
    console.log("connected");

   // 클라이언트가 메시지를 전송했을 때 수신하여 다시 보내는 과정.
    ws.on( 'message', function(msg){
        console.log("msg[" + msg + "]" );
        ws.send( msg );
    });
});

포트번호(port)는 본인이 사용하는 포트번호를 지정하면 됩니다.

그리고 구동하는 방법은 터미널에서

$ node server.js

로 js파일을 구동시킵니다.


■ Client.html

html파일이던 php파일이던 상관없습니다. 중요한건 javascript로 한다는 것이니까요.

<!DOCTYPE html>
<html lang="en">
<head>
    <meta charset="UTF-8">
    <meta http-equiv="X-UA-Compatible" content="IE=edge">
    <meta name="viewport" content="width=device-width, initial-scale=1.0">
    <script src="http://code.jquery.com/jquery-1.11.0.min.js"></script>
    <title>Document</title>
   </head>
   <body>
    <form>
     <input id="Send" type="text" autofocus>    <!--메시지 작성 영역-->
     <button type="button" onclick="sendMessage();" >Send</button>  <!--전송버튼-->
    </form>
    <div id="Recv"></div>   <!-- 보낸 메시지가 기록되는 곳 -->
    <script>
        $( document ).ready( function() {
            var txtRecv = $('#Recv');
            ws = new WebSocket("ws://localhost:8900");

            // websocket 서버에 연결되면 연결 메시지를 화면에 출력한다.
            ws.onopen = function(e){
            txtRecv.append( "connected<br>" );
            };
      
            // websocket 에서 수신한 메시지를 화면에 출력한다.
            ws.onmessage = function(e){
            txtRecv.append( e.data + "<br>" );
            };
      
            // websocket 세션이 종료되면 화면에 출력한다.
            ws.onclose = function(e){
            txtRecv.append( "closed<br>" );
            }
        });
      
        // 사용자가 입력한 메시지를 서버로 전송한다.
        function sendMessage() {
            var txtSend = $('#Send');
        
            ws.send( txtSend.val() );
            txtSend.val( "" );
            txtSend.focus()
        }
       </script>
   </body>
   </html>


■ 결과

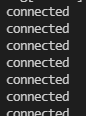
· 서버 구동 -> 연결 -> 페이지 접속마다 터미널에 "connected" 라는 로그가 찍힙니다.


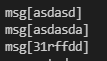
· 메시지를 작성하고 버튼을 통해 전송하였을 때,


■ 결론

-> 몇가지 보완할 내용이 존재하긴 하다.

1. jQuery로 작성하였다는 점.
    -> 필자는 jQuery를 선호하지 않는다.
        비동기통신 위주로 사용하는 스타일인데, 예전에는 ajax 사용할 때 사용했지만,
        요즘은 axios 위주로 사용하기 때문에 이마저도 잘 사용하지 않는다.


2. 사소한 버그가 있다.
    -> 메시지를 작성하고 송출하였을 때, 해당 메시지가 웹페이지에 제대로 출력이 되지 않고,
         [ Object Object ] [ Blob ] 이런식으로 작성되더라. 

    -> e.data를 통해 해당 내용을 append 시켜 작성하였는데, 아무래도 해당 node 자체가 입력이 된것이라 판단하다.
    -> 해결방법으로 <p> 를 하나 생성해서 해당 내용을 생성하여 삽입할 수 있다.

3. 뭐 그냥.. 그렇다고..


참고


[JavaScript] WebSocket echo 클라이언트/서버 예제

WebSocket 기반 echo 서버를 node.js 기반으로 개발하는 방법은 다음과 같습니다. 1. ws 패키지 설치 아...

blog.naver.com

반응형


Javascript로 select box 내의 option들을 특정 조건에 의해 함수를 호출하여 제거하려고 한다. 
검색 기능으로 사용하면 유용하다.


물론 select box 말고도 p, span, div...등등 부모-자식 관계의 태그들이라면 모두 가능하다.


Node . removeChild 를 사용한다.

const item_name = document.querySelector('#item_name')	// item_name이라는 부모 요소
while (item_name.firstChild) {		// 첫번째 자식 태그가 존재하면 무한 반복
      item_name.removeChild(item_name.firstChild);		// 첫번째 자식 태그를 제거한다. 
 }


item_name 이라는 id를 가진 태그를 querySelector로 가져온다.

가져온 태그 내 자식 태그가 1개 이상일 때 반복문이 실행된다.

그리고 removeChild를 통해 자식요소를 제거한다.


Node.removeChild() - Web APIs | MDN

The removeChild() method of the Node interface removes a child node from the DOM and returns the removed node.

developer.mozilla.org


반응형

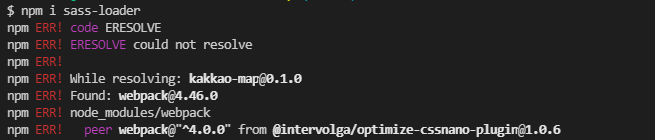
Vue-cli webpack4.0 version 에서 sass를 개별 설치하려고

$ npm i node-sass
$ npm i sass-loader

를 했는데 에러가 발생하였다.

node-sass는 정상적으로 설치가 완료되었지만, sass-loader를 설치하지 못했다.


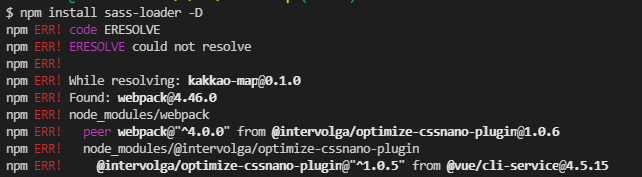
그래서 개발자버전으로 다운로드 하려했지만 또 에러를 뱉어냈다.


$ npm i sass-loader -D


■ 해결방법

Vue-cli webpack 4.0의 버전은 그에 맞는 알맞은 버전sass를 다운로드 받아야한다고 명시되어져있다.

$ npm install -D sass-loader@10.0.5 node-sass

10.0 version을 다운받아도 무방하다.


npm install -D sass-loader node-sass Vue.js 2021

Hi issue is setting up SASS for Vue.js I run: Node.js - 15.7.0 Vue.js - @vue/cli 4.5.11 This is an error in the console I am having while running this command: npm install -D sass-loader node-sass ...

stackoverflow.com


반응형
Error:  You are using an unsupported version of Node. Please update to at least Node v12.14
    at assertSupportedNodeVersion

Error:  You are using an unsupported version of Node. Please update to at least Node v12.14 at assertSupportedNodeVersion

그래서 업데이트를 진행하였는데 추가적인 에러가발생하여 node 자체를 지우고 재설치를 하게되었다.


1. node.js 제거 과정 (디렉터리와 bash 내용을 전부 삭제)

sudo rm -rf /usr/local/bin/npm /usr/local/share/man/man1/node* /usr/local/lib/dtrace/node.d ~/.npm ~/.node-gyp /opt/local/bin/node /opt/local/include/node /opt/local/lib/node_modules 

sudo rm -rf /usr/local/lib/node* ; sudo rm -rf /usr/local/include/node* ; sudo rm -rf /usr/local/bin/node*

sudo apt-get purge nodejs npm


2. node.js 설치과정

sudo apt install nodejs

sudo apt install npm

// cache 제거. 안해주시면 에러 발생가능성이 있습니다.
sudo npm cache clean -f 

// 전역에서 사용가능하게 npm을 n이라는 이름으로 다운로드
sudo npm install -g n

// 안정화 버전을 설치
sudo n stable


3. 확인

node -v
v16.13.0

npm -v
8.1.0


자꾸 오류 나고 그래서 삭제만 8번 넘게 진행한 것 같네요.

억울하고 분통터져

원래 뭘 진행하려고 했는지도 머리속에서 증발하게 되었습니다. ㅎㅎ 
다시 무엇을 하려고했는지 떠나요~


참고


[Node] Node.js, NPM 최신버전으로 업그레이드하기

기존 node.js 가 설치 되어 있다고 가정하에 업그레이드를 진행합니다. Node.js Upgrade 1. 현재 Node.js 버전확인 $ node -v 2. cache 삭제 $ sudo npm cache clean -f 3. n 모듈 설치 $ sudo npm install -g n 4..

eomtttttt-develop.tistory.com


npm Error: Cannot find module 'semver'

I get the following error when I try to run npm command root@localhost:# npm --version internal/modules/cjs/loader.js:584 throw err; ^ Error: Cannot find module 'semver'...

superuser.com


Ubuntu – Npm can’t find module “semver” error in Ubuntu 19.04 – iTecTec

I am getting the following error whenever I try to run npm command. internal/modules/cjs/loader.js:626 throw err; ^ Error: Cannot find module 'semver' Require stack: - /usr/share/npm/lib/utils/unsupported.js - /usr/share/npm/bin/npm-cli.js at Function.Modu

itectec.com

기타 등등..

반응형

안녕하세요 상훈입니다.


npm install 명령어를 통해서 npm 프로젝트를 업데이트 및 설치를 하는데 갑자기

npm ERR! code ELIFECYCLE
npm ERR! errno 1
npm ERR! node-sass@4.13.1 postinstall: `node scripts/build.js`

npm ERR! Exit status 1 
npm ERR! Failed at the node-sass@4.13.1 postinstall script.

에러가 발생하였습니다.

해당 에러는 

node.js의 버전일치로 해결이 가능합니다.


node.js - 오류 npm 설치-node-sass@4.13.1 설치 후 :`node scripts /build.js

npm을 설치할 때마다 npm ERR! errno 1 npm ERR! [email protected] postinstall: `node scripts/build.js` npm ERR! Exit status 1 npm ERR! npm ERR! Failed at the [email protected] postinstall script. npm ERR! This is probably not a problem with npm. The

www.python2.net


참고

반응형

안녕하세요 상훈입니다.

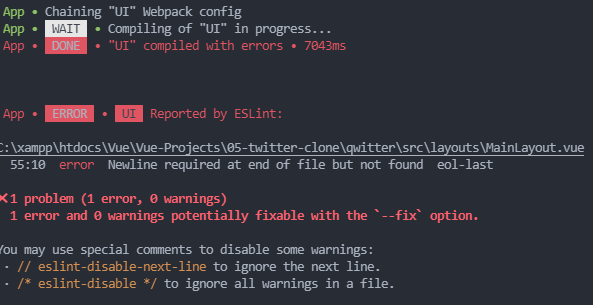
1 error and 0 warnings potentially fixable with the `--fix` option.
- npm run serve
- quasar dev


노드를 이용하여 프로젝트를 구동 하던 와중에 해당 에러가 발생하였다.


중요한건 아니지만 에러 인증 정도.


--fix 옵션을 이용하여 뭘 어떻게 하라는건 알겠는데 node를 잘사용해보지 않은 입장에서는 당황스러울 수 있다.


에러 해결:

./node_modules/.bin/eslint src --fix

이렇게 하면 된다.


그리고 다시 프로젝트 구동!


수고용


저는 vue.js 를 공부중입니다.

quasar 와 함께용.


반응형

+ Recent posts